How To Set Row Height In Excel
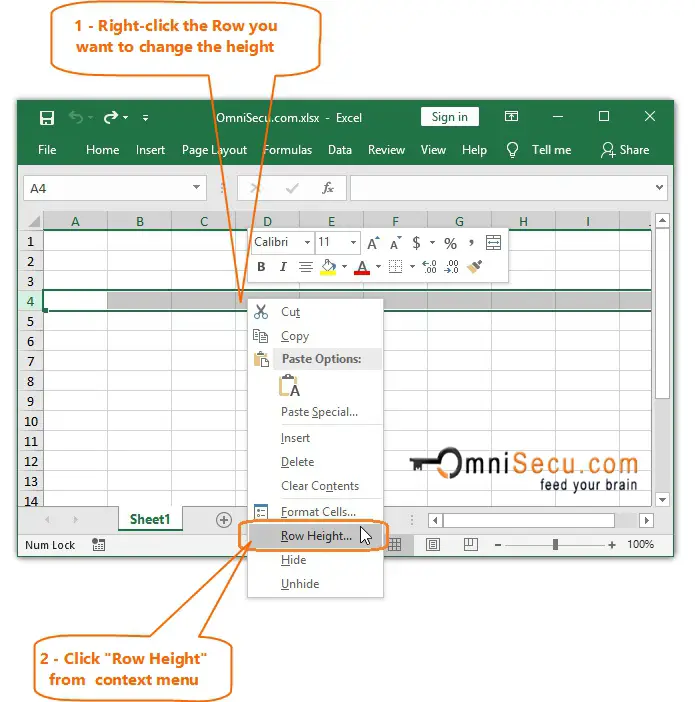
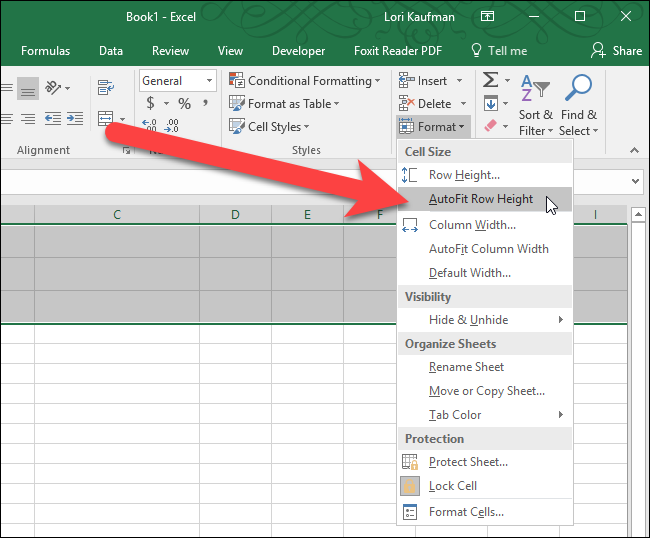
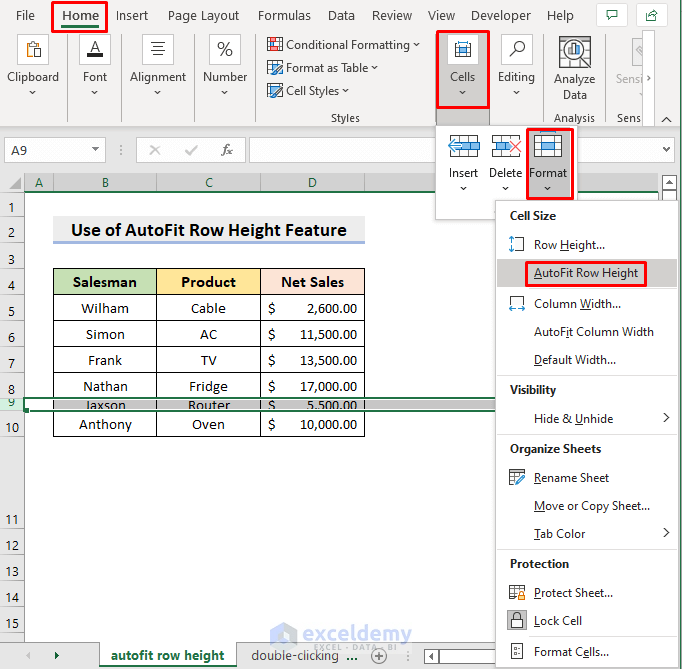
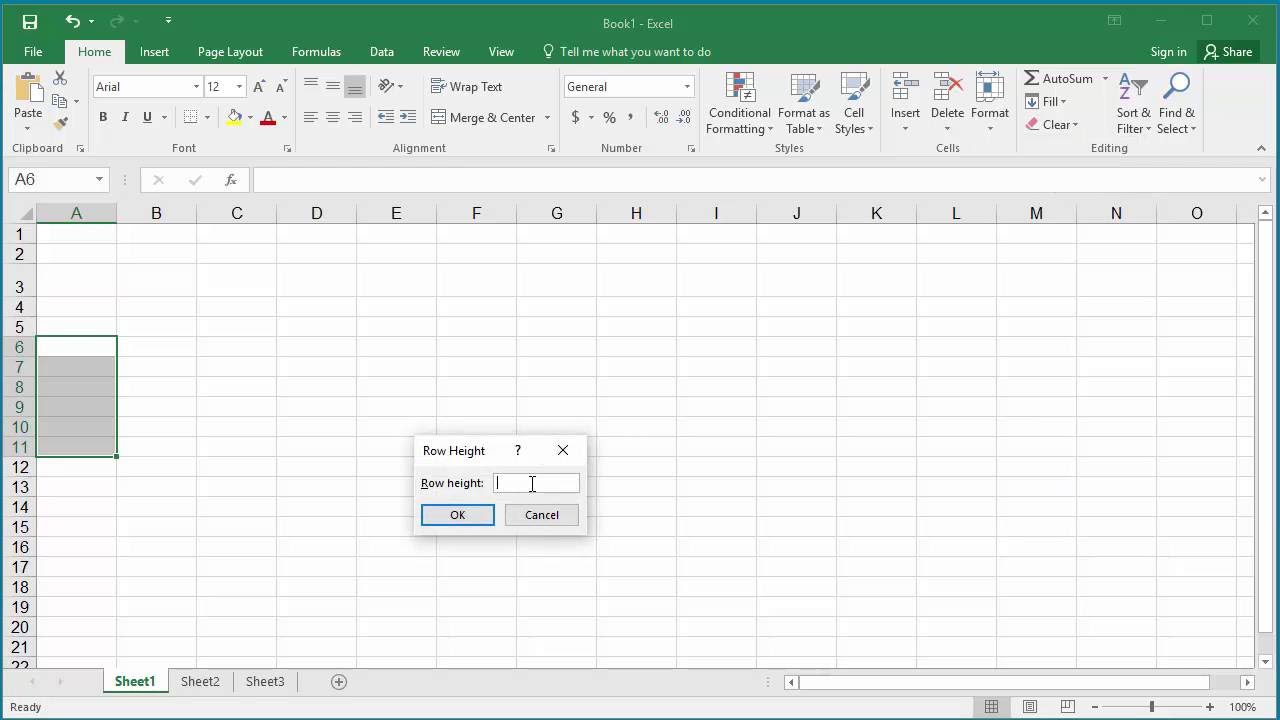
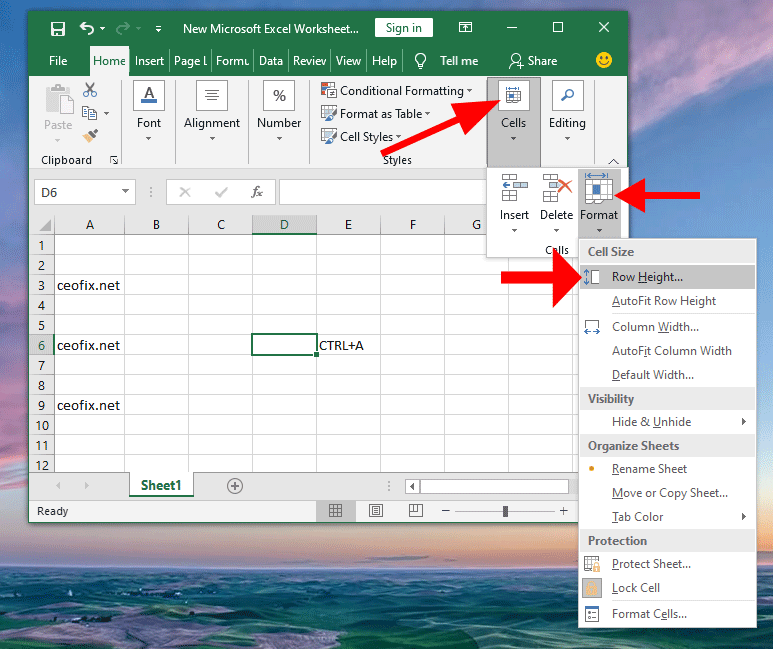
How To Set Row Height In Excel - Change the height of all rows on a sheet select all cells on the sheet by clicking the. To change the height of a single row, drag the boundary below the row heading until the row is the height you want. To specify a row height, select row height, and then type the row height that you want in the row height box. Select the boundary of the column or row you want to move and drag it to the width or height you want. There is a minimum cell height, which depends on the font size of the text in the. Use the horizontal and vertical ruler to measure items in the worksheet (such as column width, row height, or the width and height of pages). Although excel offers no direct control for line spacing within a cell, you can use several text alignment strategies to adjust white space or make the text more readable. On the layout tab, in the cell size group, click in the table row height box, and then specify. Select the rows or columns and then select layout and choose your height and width. To set the row height to a specific measurement, select a cell in the row that you want to resize. There is a minimum cell height, which depends on the font size of the text in the. On the table layout tab, in the cell size group, enter the size that you want in the height and width boxes. You can change the default units for column widths, row heights, and the graduations of the horizontal and vertical sheet rulers.. To decrease the height, drag the bottom boundary up. You can change the default units for column widths, row heights, and the graduations of the horizontal and vertical sheet rulers. Select the boundary of the column or row you want to move and drag it to the width or height you want. To specify a row height, select row height,. Use the horizontal and vertical ruler to measure items in the worksheet (such as column width, row height, or the width and height of pages). Change the height of all rows on a sheet select all cells on the sheet by clicking the. Select the boundary of the column or row you want to move and drag it to the. On the table layout tab, in the cell size group, enter the size that you want in the height and width boxes. To change the row height of multiple rows, select the rows that you. To change the height of a single row, drag the boundary below the row heading until the row is the height you want. Although excel. On the table layout tab, in the cell size group, enter the size that you want in the height and width boxes. To specify a row height, select row height, and then type the row height that you want in the row height box. Change the height of all rows on a sheet select all cells on the sheet by. Select the boundary of the column or row you want to move and drag it to the width or height you want. To set the row height to a specific measurement, select a cell in the row that you want to resize. Although excel offers no direct control for line spacing within a cell, you can use several text alignment. Select the rows or columns and then select layout and choose your height and width. To change the height of a single row, drag the boundary below the row heading until the row is the height you want. On the layout tab, in the cell size group, click in the table row height box, and then specify. There is a. To automatically adjust the row height, select autofit row height. On the layout tab, in the cell size group, click in the table row height box, and then specify. There is a minimum cell height, which depends on the font size of the text in the. To decrease the height, drag the bottom boundary up. To change the height of. Select the boundary of the column or row you want to move and drag it to the width or height you want. To set the row height to a specific measurement, select a cell in the row that you want to resize. To change the row height of multiple rows, select the rows that you. On the layout tab, in. To set an exact height measurement, on the format menu, point to row, and then click height. To specify a row height, select row height, and then type the row height that you want in the row height box. You can change the default units for column widths, row heights, and the graduations of the horizontal and vertical sheet rulers..
How to Change Row Height in Excel (6 Easy Ways) ExcelDemy

How to Set Row Height and Column Width in Excel Using the Keyboard
How to change the Row height in Excel worksheet

How to Set Your Row Height in Excel 12 Steps (with Pictures)

How to Set Your Row Height in Excel 12 Steps (with Pictures)
How to Set Row Height and Column Width in Excel
How to Auto Fit Row Height in Excel (5 Useful Ways) ExcelDemy
Excel formula for row height psadodouble

Row Height Units in Excel How to Change? ExcelDemy
How To Set Row Height In Excel Using Vba Printable Forms Free Online
Related Post: